Archive | Preserving the Harvest RSS feed for this section

Lots of shelling goin on….Southern zipper cream peas

If you were born eating southern peas then you must be from the south.  Not only was I not born in the south, the only peas or beans I ever ate growing up were made Cuban style.  Since moving to the south I have fully embraced every kind of southern food, though I still have not eaten the most popular kind, black eyed peas (any good family recipes you want to share?)

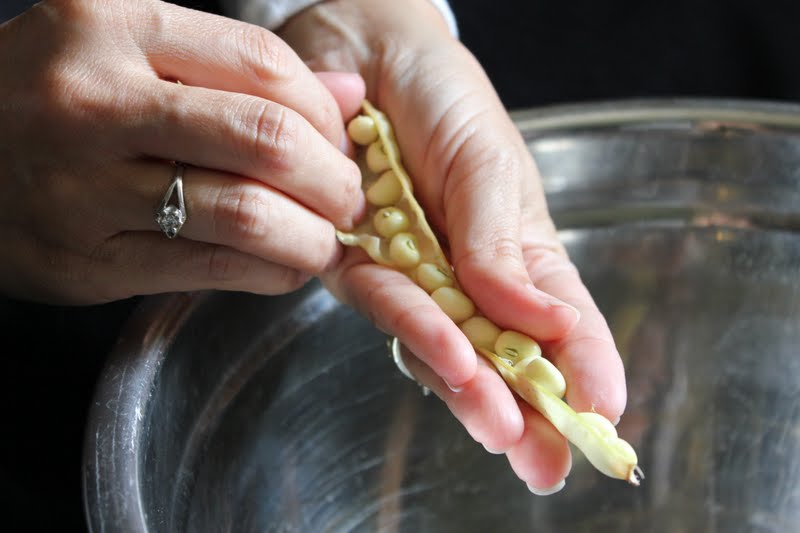
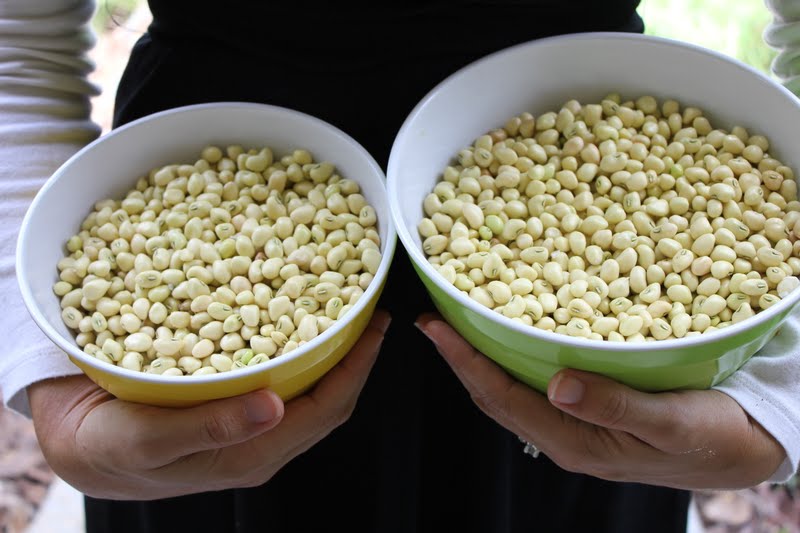
Luck would have it that last Saturday on my morning farmers market run, my favorite farmer hands me a bag and tells me that I have to buy it.  I look inside and I see beans or peas in very long pods.  I give her the “what is this” look and she tells me they are zipper cream peas and she saved a half bushel for me.  Not wanting to mess with my favorite farmer I say yes maam and hand her some money.  
So I start doing some internet research and I find out two things. 1.  Southerners really love their peas, zipper peas included. 2.  Southerners are not into putting their recipes on the net.  3. They are called zipper cream peas because they are easy to open and they make very creamy soup (so that was three but I couldn’t leave the last one out).

If you think you can’t grow anything in the summer, here is your crop.  Southern peas love the heat and will give you quite a lot for your effort.

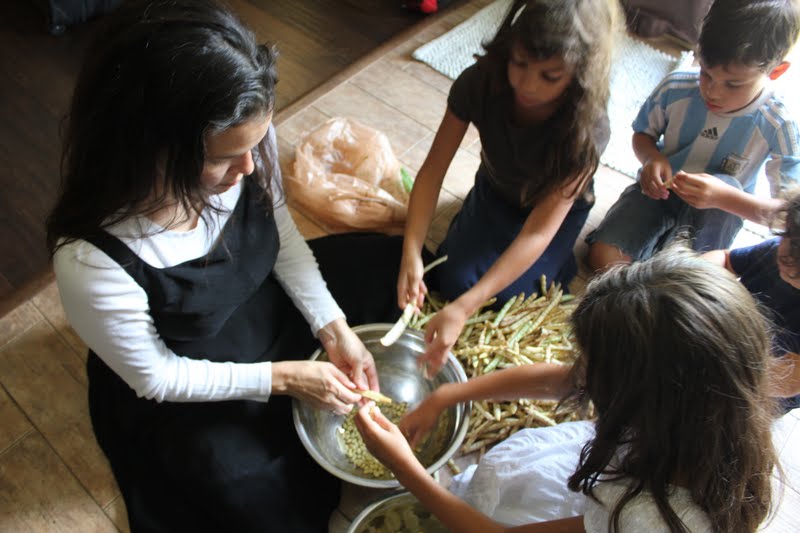
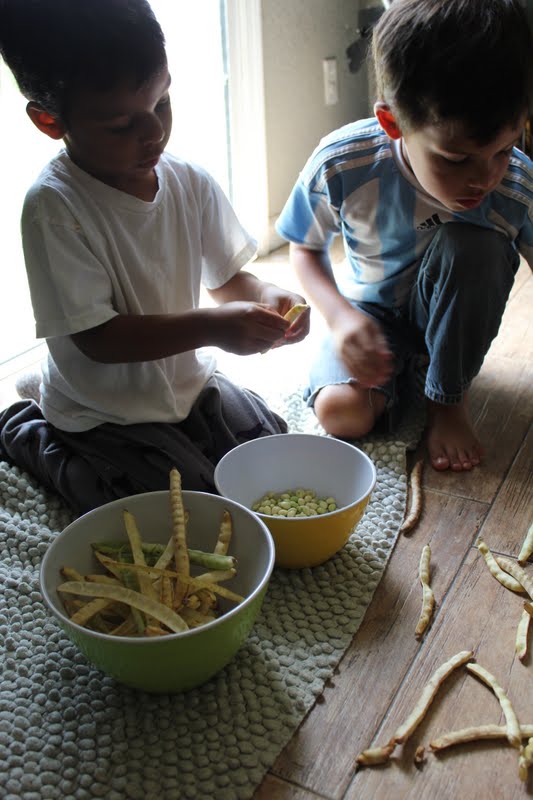
 My children love doing this type of work with me. 
  As we were sitting in the kitchen shelling peas, I thought to myself how someday I will probably not remember eating these peas but I would remember all of us sitting peeling open the pods, the baby ripping them in three and throwing them in the pot with all the peas still inside.
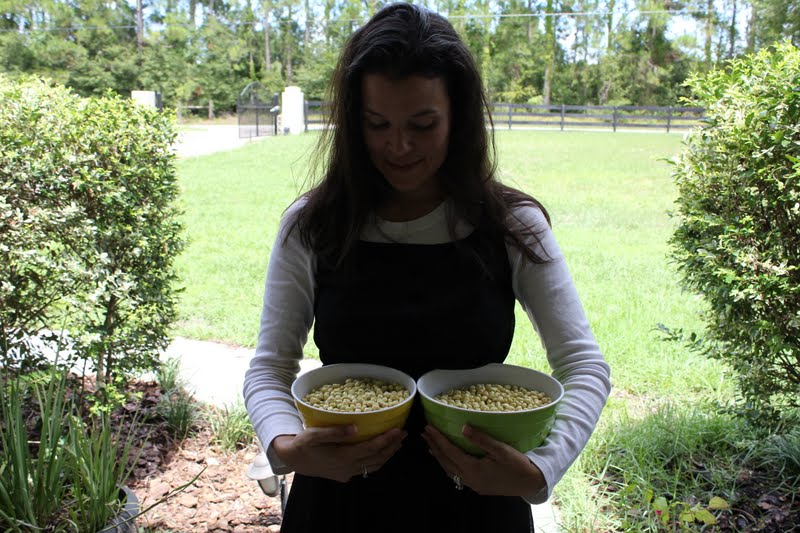
  I did go through the empty pods afterwards and found about another cup full of peas that had gotten thrown in the bowl destined for the compost. I ended up with enough peas to make three or four batches of southern peas.
I can’t wait to see how these taste.  Check in tomorrow for the recipe.
Comments { 2 }

We’re jammin… Nilla strawberry jam

I love this time of year in my town.  We have u-pick farms all around with corn, blueberries, blackberries and strawberries.  Strawberries and more importantly, jam is our favorite.  I love this recipe because it is soooo yummy and the vanilla (though you don’t really taste it) brings another depth of flavor.

What you need:
3 pints of strawberries, green top cut off
4 cups of sugar
Juice from half a lemon
1 tsp really good vanilla (I use Neisen Massey Bourbon vanilla)

 wash your strawberries

 I added about a cup of the sugar

 then start mashing!  This is the hardest part I promise.

 mash until you get to the consistency you like.  I don’t like chunky so I mashed alot, you might like bigger pieces of berries so that is up to you.  At this point it was so yummy that I had a hard time convincing myself to continue and not use them as is but I need jam so I had to continue on

 add the lemon (make sure you use a sieve to catch the seeds)

 add your vanilla…I added this picture to show you my vanilla.  In my (very humble) opinion this is the very best vanilla out there.  It is expensive but the flavor is so amazing that to me it is totally worth it and it is my little secret for a few years now which I share with you.

Now take your berry mash and put it into your pot, add the rest of the sugar and cook it on medium until it reduces and starts getting thicker.  I do not use pectin in my recipe because I want it to be as natural as possible.  We tried it today and it was perfectly jelled and oh so good.  OK back to the recipe.  How can you tell if you are ready to put your jam into jars?  Here is what I do.

  I put a little plate in the freezer and I take it out when I am ready to test my jam.  I put a little and since the plate is frozen cold it will jell up if ready.

 put into your jars, put the lids on and then can them.  You can find lots of instructions on line but basically, I boil a big soup pot of water.  I put my jars and lids in and boil them for a few minutes.  Carefully take them out and I put them on a towel or cloth on the counter.  I ladle my jam into each jar leaving a little room at the top.  Put the lids on and put them into the boiling water for about 10 minutes.  I remove them and wait for the plink.  The plink is the sound the jar lid makes when it seals (love that sound).  If after about 20 minutes your jar lids do not seal you can either boil them again or put them in the fridge.

I promise you will never want to eat store bought again…  my kids said it was unbelievable, incredible and totally awesome (that kid sound like he is from the 80s).  I spent a total of $4 to make this jam and I got 8 jars.  Even if you don’t have a u-pick in your town, last week Whole Foods had organic strawberries for $1 for a pound of strawberries.  Keep an eye out for those sales.

Comments { 5 }